Retaining wall blocks are parts of a system, not interchangeable landscaping pieces. This guide helps you assemble the dimensions, product information and specified material details needed for a useful takeoff and cost comparison.
Maintained by BlockCalculatorPro. Check our reference cases.
First identify the retaining wall system
Segmental retaining walls use manufactured units with a defined connection or interlock system. Product instructions explain the arrangement, setback and required components. A familiar block face or a retail label such as landscape block does not identify every requirement of the system.
Mortared CMU retaining walls use concrete masonry units in a specified assembly. Their mortar, grout, reinforcement, footing and water management details differ from a segmental wall. The terms cement block retaining wall and concrete block retaining wall can refer to this approach, so confirm the product and construction system before choosing inputs.
Our retaining wall calculator separates supported segmental and CMU quantity assumptions. It does not turn paving units, timber, natural boulders or a poured concrete wall into an equivalent block system. A paver retaining wall search should start by confirming that the proposed product is specified for that wall application.
A freestanding raised planting bed is a different quantity task from a retaining wall supporting a grade change. For its specified dry rectangular footprint, use the garden bed calculator. Its material count does not establish the suitability of the assembly for retained soil.
Collect product dimensions, caps and corner details
| Detail | Why it matters |
|---|---|
| Manufacturer and exact product | Connects the estimate to the correct current instructions |
| Installed face length and course height | Controls units along the run and the number of courses |
| Depth and setback or batter | Affects the footprint and the reference line at each course |
| Corner, end and half units | Produces a purchase list by actual piece type |
| Cap length and finish | Separates the top finish from body units and accounts for turns |
| Required connector or adhesive products | Allows a separate quantity and cost entry where specified |
Use installed dimensions from the manufacturer. A tapered block can have different front and rear lengths, and a lip or interlock can affect how a course fits. Confirm whether a quoted dimension is nominal, physical or installed coverage. Count exposed ends and corners from the actual plan rather than adding a standard percentage for every wall.
Where a supplied project includes posts or stairways, count those components separately. The column calculator can total specified course patterns, and the steps calculator can itemize tier, support and finish quantities. Neither a constant wall area nor an unexplained extra percentage captures those components reliably.
How to measure a retaining wall
Make a simple plan with a label for every straight run, curve, corner and change in level. Record the units and the line being measured, such as the specified front face. Keep that reference consistent throughout the estimate.
- Wall run: measure along the intended wall alignment. Separate returns and adjoining runs so corners are not counted twice.
- Exposed height: record the vertical face visible above the finished ground at the front of the wall. Note whether your measurement includes the cap.
- Specified buried height: record the embedment shown by the project details. Add those units to the takeoff even though they will not be visible.
- Body and cap: keep body course height separate from cap thickness so the cap is not included in both categories.
- Level changes: mark the start and end of every height change, including stepped foundations or a sloping top where specified.
Do not substitute exposed height for the total block height. Equally, do not invent a buried course allowance to finish the estimate. Obtain the specified value and keep it attached to the result. The manufacturer’s material worksheet is a useful cross check, while the project documents determine the final geometry.
Curves and changing heights need their own measurements
A chord is not the length of a curved wall. For a documented circular arc, arc length = radius × angle in radians. With degrees, arc length = radius × π × angle ÷ 180. A quarter circle with a 6 foot radius has an arc length of about 9.425 feet; the straight line joining its ends is about 8.485 feet. Using that chord would understate the curved run.
State which face or centerline the radius describes. Setback and curves can change the run at higher courses. Follow the product layout or a course schedule where that difference matters, and check the caps against the actual top run. An irregular curve needs measured segments or an appropriate surveyed plan rather than a guessed circle.
For changing heights, divide the wall into measured sections. A 12 foot run at 2 feet of specified block height plus an 8 foot run at 3 feet has 48 square feet of face. An unweighted average height of 2.5 feet would give 50 square feet and hide the different run lengths. Sloping or stepped work also needs a course check because an area total alone does not identify every whole unit or cut.
These are measurement examples, not recommended wall dimensions.
Separate block quantities from base and drainage materials
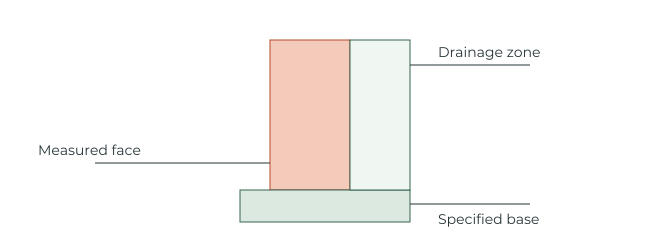
Base aggregate, drainage aggregate, backfill, pipe, fabric and reinforcement can be separate items with different measurement bases. Take their extent and specification from the applicable design and manufacturer instructions. This guide does not prescribe a universal base width, depth, drainage zone or reinforcement arrangement.
- Base volume: use the specified length, width and thickness for each distinct section. Keep compacted volume separate from loose delivery volume.
- Drainage aggregate: identify exactly which zones are included, including unit cores only where specified. Avoid counting the same zone again as general backfill.
- Pipe and outlets: use the documented route, fittings and discharge details. Wall length alone may not describe the complete installation.
- Fabric, connectors and reinforcement: use the specified product and layout, including overlaps and layers where provided.
- Ordering conversion: obtain supplier density, packaging or conversion information when buying aggregate by weight or bulk volume.
A calculator can multiply specified geometry. It cannot determine which drainage solution or reinforced soil zone is appropriate for the site.
What to establish before planning construction
When asking how to build a retaining wall, begin with the site and selected product system. Relevant information includes soil conditions, ground levels, slopes above and below the wall, water movement, property boundaries and nearby structures or vehicle loads. Utilities, access and local permit requirements also affect the project.
Use the current manufacturer guidance and the project’s design documents together. A product’s illustrated example is not an approval for a different site. The need for professional design depends on the actual conditions and local requirements; this site does not publish a universal height below which every wall is suitable.
The quantity tools do not evaluate sliding, overturning, bearing, settlement, global stability or reinforcement capacity. Obtain the necessary site and design decisions before using a material list as a purchasing or construction schedule.
Turn the measurements into a useful supplier estimate
- Label each wall section with its measured run, exposed height and specified buried courses.
- Record the product code, installed dimensions, finish and relevant instruction revision.
- List body units, corners, end units and caps separately, with the reason for each allowance.
- Keep specified base, drainage, backfill and accessories on distinct lines.
- Confirm supplier packaging, availability, loose unit sales, delivery and any return conditions.
- Separate materials from excavation, labor, equipment, disposal and design or permit costs.
Use the material calculator to organize supported quantities, then use the retaining wall cost calculator with local prices and explicit inclusions. When comparing quotations, check that each covers the same geometry, products and work. See the CMU guide if the wall terminology is unclear.
Common questions
How do I measure for a retaining wall estimate?
Measure along the intended wall alignment, divide changing heights into labeled sections, and record exposed and specified buried height separately. Identify whether caps are included in the height measurement. Use the selected product’s installed dimensions and a consistent reference line.
Do I include buried blocks in the quantity?
Yes. Include the buried courses or height specified for the project as well as the exposed body units. The calculator does not choose suitable embedment from visible height alone.
Can ordinary cement blocks be used for a retaining wall?
A mortared CMU retaining wall and a segmental wall are different specified systems. A product’s name or appearance does not establish suitability. Use the appropriate product, project details and required design before estimating its materials.
Can paving blocks be used to build a retaining wall?
Do not infer retaining wall suitability from a paving product’s shape. Confirm the manufacturer’s stated application and the project requirements. The retaining calculator models supported wall systems, not arbitrary stacks of pavers.
How much base or drainage stone do I need?
Calculate from the specified material zones and geometry, then use the supplier’s ordering conversion. Base and drainage details depend on the product system, site and design. There is no single base depth or drainage allowance used for every wall here.
Does the retaining wall calculator show how high I can build?
No. It estimates quantities for geometry you provide. Allowable height, embedment, reinforcement and stability require the selected system’s design information, site conditions and applicable local requirements.
Should I measure a curved wall across its endpoints?
No, not as the wall run. The straight distance between endpoints is a chord. Use the measured curve length or a supported circular arc calculation, and state the face or centerline used for the radius.
Sources and product references
Named product references support the examples. Confirm the currently supplied dimensions, yields and purchasing conditions before ordering.
- Allan Block: Retaining Wall PlanningManufacturer planning guidance on site geometry, soil, loads, drainage and project conditions. It is not a substitute for the applicable project design.
- Allan Block Commercial Retaining Wall ManualThe manufacturer manual includes a material estimate worksheet, separate wall materials and buried block quantities. Use specified project geometry and local product dimensions. This reference supplies no example prices. Manufacturer reference for product dimensions, material quantities and separate wall components. Confirm the locally supplied system.
- CMHA: Segmental Retaining Wall Best Practices GuideIndustry resource separating the specification, design, construction and inspection of a complete retaining wall system.
- Allan Block: Residential Retaining Walls GuideAn example of manufacturer system documentation. Use instructions applicable to the selected product and site rather than transferring dimensions to another system.